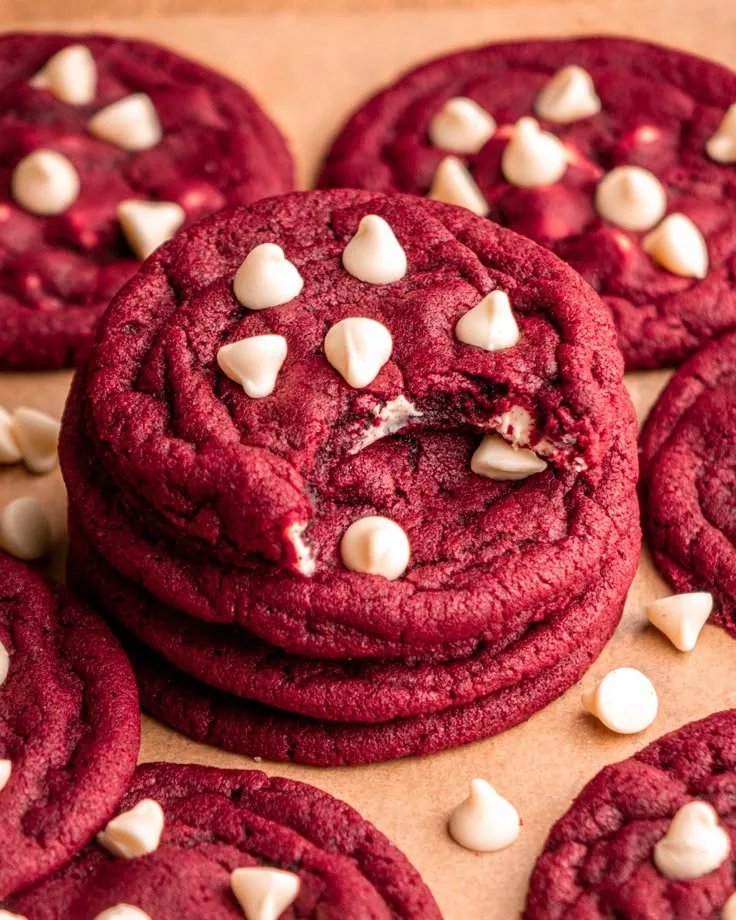
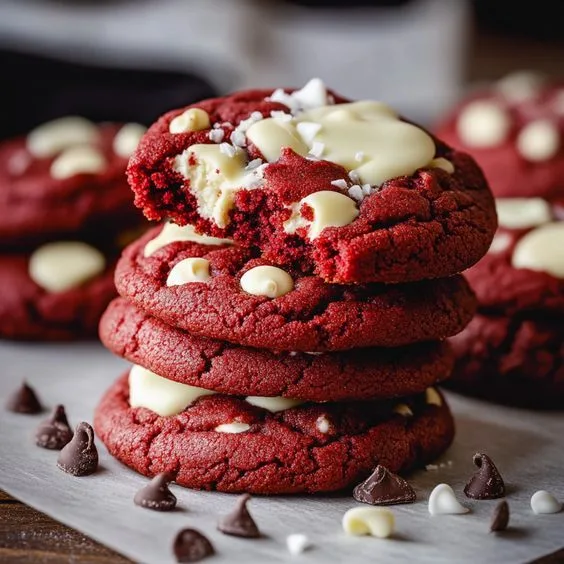
Red Velvet Cookies are a delightful twist on the classic red velvet cake, packed with rich flavor and a stunning pop of color. These cookies are soft, chewy, and beautifully flavored with cocoa, creating a perfect balance between sweetness and a slight cocoa bitterness. The vibrant red hue of these cookies is sure to make them a showstopper at any gathering, while the creamy cream cheese frosting adds an indulgent touch. With a subtle hint of vanilla and a creamy texture, Red Velvet Cookies are perfect for special occasions, holidays, or whenever you want to add a little extra joy to your day. These cookies are as delicious as they are beautiful and are bound to impress anyone who takes a bite!
Why You’ll Love It
Red Velvet Cookies are an irresistible treat that combines the best elements of a classic red velvet cake in cookie form. The combination of cocoa and vanilla gives these cookies a rich, satisfying flavor, while the soft, chewy texture makes them incredibly addictive. The tangy cream cheese frosting on top elevates them even further, giving the cookies a smooth, indulgent finish. Whether for a party, holiday, or just a special treat, these cookies are sure to delight anyone who tries them.
Cooking Time
- Prep Time: 15 minutes
- Cook Time: 10-12 minutes
- Total Time: 30 minutes
- Servings: 18-24 cookies
Ingredients
- 2 ½ cups all-purpose flour
- 2 tbsp cocoa powder
- 1 tsp baking soda
- ½ tsp salt
- 1 cup unsalted butter, softened
- 1 ½ cups granulated sugar
- 1 large egg
- 2 tbsp buttermilk
- 1 tbsp red food coloring
- 1 tsp vanilla extract
- ½ cup cream cheese, softened
- 2 tbsp unsalted butter (for frosting)
- 1 ½ cups powdered sugar
- ½ tsp vanilla extract (for frosting)
Instructions
1. Prepare the Dough
Preheat your oven to 350°F (175°C). In a medium bowl, whisk together the flour, cocoa powder, baking soda, and salt. Set aside. In a large mixing bowl, beat the softened butter and sugar until light and fluffy. Add the egg, buttermilk, red food coloring, and vanilla extract. Mix until fully incorporated.
2. Mix the Dry Ingredients
Gradually add the dry ingredients to the wet mixture, stirring until a dough forms. The dough will be thick and slightly sticky, but it should hold together. If the dough feels too soft, chill it in the fridge for 10-15 minutes to firm up.
3. Shape and Bake the Cookies
Using a cookie scoop or spoon, drop tablespoon-sized portions of dough onto a parchment-lined baking sheet, spacing them about 2 inches apart. Bake for 10-12 minutes, or until the edges are set and the cookies are slightly puffed. Let them cool on the baking sheet for a few minutes before transferring them to a wire rack to cool completely.
4. Frost the Cookies
While the cookies cool, prepare the frosting. In a small bowl, beat the softened cream cheese and butter together until smooth and creamy. Gradually add the powdered sugar and vanilla extract, mixing until the frosting is fluffy and spreadable. Once the cookies have cooled, spread a generous amount of cream cheese frosting on top of each one.

Variations
- Chocolate Chips: Add ½ cup of chocolate chips to the cookie dough for extra chocolate flavor and texture.
- No Frosting: For a simpler version, skip the frosting and just enjoy the cookies as they are, or sprinkle powdered sugar over the top.
- Mini Cookies: Make mini red velvet cookies by using a teaspoon to scoop smaller portions of dough, reducing the baking time to 7-9 minutes.
Equipment You’ll Need
- Baking sheets
- Parchment paper
- Medium and large mixing bowls
- Whisk and hand mixer or stand mixer
- Cookie scoop or tablespoon
- Wire rack
Nutritional Information (Per Cookie)
- Calories: ~180
- Fat: 9g
- Carbohydrates: 25g
- Sugar: 18g
- Protein: 1g
Storage Tips
- Refrigerate: Store any leftover cookies in an airtight container in the fridge for up to 4 days.
- Freezing: You can freeze the cookies for up to 2 months. Wrap them tightly in plastic wrap and store in a freezer-safe bag. To enjoy, thaw them at room temperature and add fresh frosting if desired.
- Room Temperature: Store at room temperature for up to 2 days, but keep them in an airtight container to prevent them from drying out.
My Cooking Experience
With over 4 years in the kitchen, I’ve made countless batches of cookies, but these Red Velvet Cookies always stand out. They’re the perfect balance of rich cocoa flavor, a soft and chewy texture, and the indulgent cream cheese frosting. The vibrant red color makes them a real showstopper, and they’re always a hit at parties and family gatherings. I love how simple they are to make, yet they taste like something special.
Conclusion
Red Velvet Cookies are the perfect treat for any occasion, offering all the flavors of red velvet cake in a soft, chewy cookie. The creamy cream cheese frosting adds a luxurious touch, making each bite even more indulgent. Whether you’re baking for a holiday, a birthday, or just because, these cookies are sure to impress. Give them a try and enjoy the rich, velvety goodness that only red velvet can bring!
red velvet cookies
Ingredients
Method
- Preheat your oven to 350°F (175°C). In a medium bowl, whisk together the flour, cocoa powder, baking soda, and salt. Set aside. In a large mixing bowl, beat the softened butter and sugar until light and fluffy. Add the egg, buttermilk, red food coloring, and vanilla extract. Mix until fully incorporated.
- Gradually add the dry ingredients to the wet mixture, stirring until a dough forms. The dough will be thick and slightly sticky, but it should hold together. If the dough feels too soft, chill it in the fridge for 10-15 minutes to firm up.
- Using a cookie scoop or spoon, drop tablespoon-sized portions of dough onto a parchment-lined baking sheet, spacing them about 2 inches apart. Bake for 10-12 minutes, or until the edges are set and the cookies are slightly puffed. Let them cool on the baking sheet for a few minutes before transferring them to a wire rack to cool completely.
- While the cookies cool, prepare the frosting. In a small bowl, beat the softened cream cheese and butter together until smooth and creamy. Gradually add the powdered sugar and vanilla extract, mixing until the frosting is fluffy and spreadable. Once the cookies have cooled, spread a generous amount of cream cheese frosting on top of each one.
Notes
- Refrigerate: Store any leftover cookies in an airtight container in the fridge for up to 4 days.
- Freezing: You can freeze the cookies for up to 2 months. Wrap them tightly in plastic wrap and store in a freezer-safe bag. To enjoy, thaw them at room temperature and add fresh frosting if desired.
- Room Temperature: Store at room temperature for up to 2 days, but keep them in an airtight container to prevent them from drying out.


