Snow Ice Cream is a magical and easy-to-make winter dessert that brings joy to kids and adults alike. Made with freshly fallen snow, sweetened condensed milk, and vanilla extract, this no-cook treat comes together in minutes and delivers creamy, sweet satisfaction with every spoonful. Whether you’re stuck inside on a snow day or just looking to make the most of a winter wonderland, this nostalgic recipe is a perfect excuse to head outside and scoop up some fresh snow. It’s pure, simple fun—and absolutely delicious.
What Makes This Dessert Special?
Snow Ice Cream is unique because it uses nature’s own ingredient—fresh snow—as the base. It’s incredibly easy to make, requiring no fancy equipment or cooking. It’s also endlessly customizable: add sprinkles, cocoa powder, fruit syrups, or chocolate chips to make it your own. This is the kind of recipe that creates memories. Whether you’re introducing your kids to this treat or reliving your own childhood, Snow Ice Cream is the essence of winter delight.
Cooking Time
- Prep Time: 5 minutes
- Total Time: 5 minutes
- Servings: 4
Ingredients
- 8 cups fresh, clean snow (or shaved ice)
- 1 (14 oz) can sweetened condensed milk
- 1 teaspoon vanilla extract
- Pinch of salt (optional)
Instructions
1. Collect Clean Snow
Go outside and scoop up 8 cups of clean, fluffy snow. Avoid any discolored or icy patches. You can also freeze a metal bowl ahead of time to help keep the snow from melting too quickly.
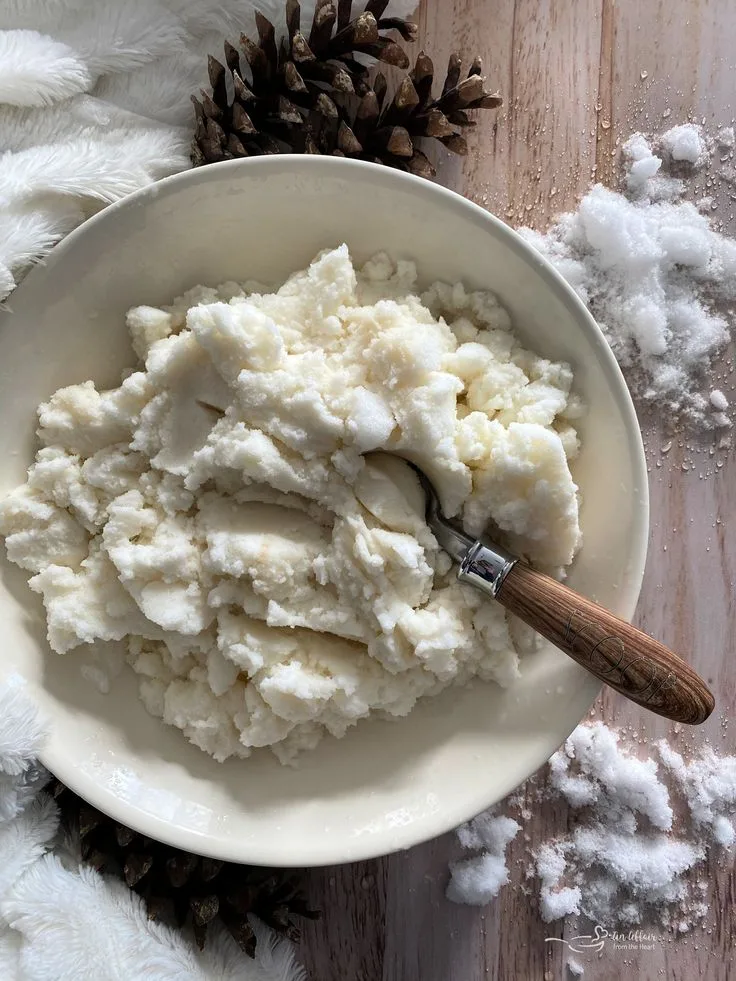
2. Mix the Ice Cream
In a large mixing bowl, pour the sweetened condensed milk and vanilla extract over the snow. Add a pinch of salt if desired—it helps enhance the flavors. Stir gently with a spoon or spatula until fully combined and creamy. Be careful not to overmix, or the snow may melt and turn slushy.
3. Serve Immediately
Scoop into bowls and serve right away for the best texture. You can top it with chocolate syrup, crushed cookies, sprinkles, or a dusting of cinnamon if desired.
4. Enjoy While It Lasts
Snow Ice Cream is best eaten fresh. It will start to melt quickly, so don’t wait too long to dig in.
Variations
- Chocolate Snow Ice Cream: Stir in 2 tablespoons of unsweetened cocoa powder or chocolate syrup.
- Strawberry Delight: Mix in strawberry syrup or puree for a fruity twist.
- Mint Chip: Add peppermint extract and mini chocolate chips.
- Coconut Dream: Use coconut milk instead of sweetened condensed milk and top with shredded coconut.
- Dairy-Free: Substitute with sweetened almond, oat, or coconut condensed milk.
Equipment You’ll Need
- Large mixing bowl (preferably chilled)
- Measuring cup
- Spoon or spatula
- Ice cream scooper (optional)
Nutritional Information (Per Serving)
- Calories: ~220
- Fat: 6g
- Carbohydrates: 35g
- Sugar: 30g
- Protein: 4g
(Nutritional values may vary slightly based on mix-ins.)
Storage Tips
- Immediate Enjoyment: Snow Ice Cream is meant to be enjoyed right after it’s made.
- Short-Term Freezing: If you must store it, place in a freezer-safe container and freeze for 1–2 hours. Note that the texture will change and become more icy.
- Avoid Long-Term Storage: The snow-based texture does not hold up well over time.
My Cooking Experience
With over 4 years of experience in the kitchen, I’ve made everything from gourmet cakes to comfort foods—but few things bring out the childlike joy like Snow Ice Cream. It’s such a simple recipe, but it captures the whimsy of winter perfectly. The first time I made it was during a snowstorm, and since then, it’s become a yearly tradition. Watching people’s faces light up as they try it never gets old.
Conclusion
Snow Ice Cream is a delightful, creamy dessert that turns a snowy day into a celebration. With only a few ingredients and no cooking required, it’s a quick way to make the most of winter weather. Whether you keep it classic with vanilla or try one of the fun variations, this treat is a wonderful way to embrace the cold. So the next time snow starts to fall, grab a bowl and whip up this winter magic—you won’t regret it.
Snow Ice Cream Recipe
Ingredients
Method
- Go outside and scoop up 8 cups of clean, fluffy snow. Avoid any discolored or icy patches. You can also freeze a metal bowl ahead of time to help keep the snow from melting too quickly.
- In a large mixing bowl, pour the sweetened condensed milk and vanilla extract over the snow. Add a pinch of salt if desired—it helps enhance the flavors. Stir gently with a spoon or spatula until fully combined and creamy. Be careful not to overmix, or the snow may melt and turn slushy.
- Scoop into bowls and serve right away for the best texture. You can top it with chocolate syrup, crushed cookies, sprinkles, or a dusting of cinnamon if desired.
- Snow Ice Cream is best eaten fresh. It will start to melt quickly, so don’t wait too long to dig in.
Notes
- Immediate Enjoyment: Snow Ice Cream is meant to be enjoyed right after it’s made.
- Short-Term Freezing: If you must store it, place in a freezer-safe container and freeze for 1–2 hours. Note that the texture will change and become more icy.


